URVEPi Tips&Tricks
Python and IDLE3 in URVEPi Debian 11
Python3 is installed by default. To install IDLE3 just type in terminal
apt install idle3
IDLE will show in Applications / Development menu.
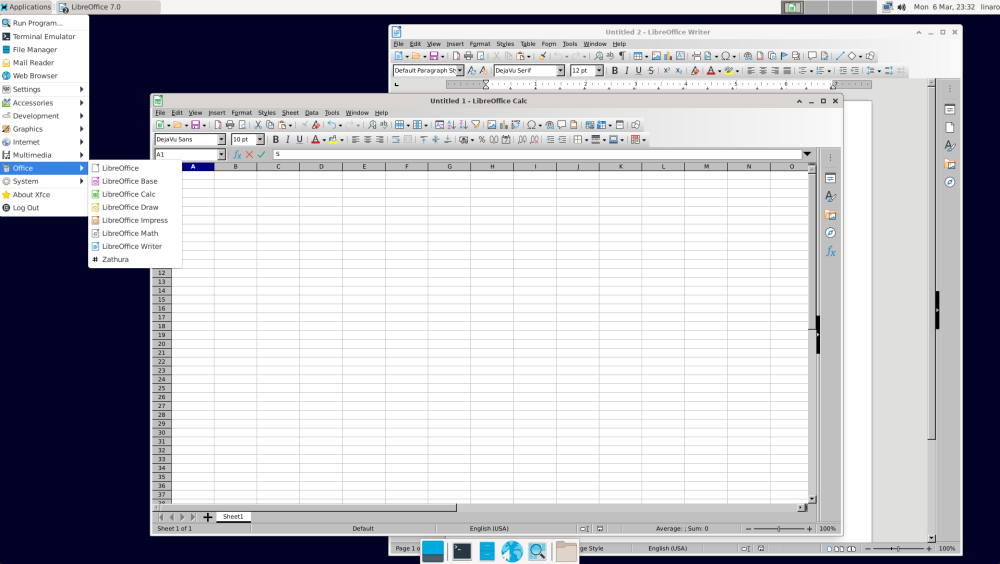
Office in URVEPi Debian 11
LibreOffice can be easily installed via apt. To install IDLE3 just type in terminal
apt install libreoffice
All LibreOffice applications will show in Applications / Office menu.
How to install Arduino IDE in URVEPi Debian 11
Arduino IDE can be downloaded by apt . To install Arduino IDE just type in terminal:
apt install arduino
It will appear in Applications / Development. For newer versions of Arduino IDE, you need to download it manually from arduino.cc webpage. You can easily find how to on the Internet. Just remember to use Linux ARM 64 bits version.
Installing node.js, geany, thonny and Node-RED in URVEPi Debian 11
It's little tricky. You need to open terminal from Applications menu (for nvm you need to be local user):
$ sudo apt install python3-tk thonny geany # both will be available in Applications / Development
$ curl -o- https://raw.githubusercontent.com/nvm-sh/nvm/v0.35.3/install.sh | bash
$ nvm install node # now we have npm
$ npm install -g --unsafe-perm node-red
$ node-red # this will run node-red, so you can run browser and go to localhost:1880
FTP server in URVEPi Debian 11
To install an FTP server, we can use VSFTPD which is set to read-only mode by default. To change it to read-write mode, follow these simple steps:
- Install VSFTPD using the command
apt install vsftpd. - Edit the
/etc/vsftpd.conffile and uncomment the linewrite_enable=YESby removing the "#" symbol at the beginning. - Restart the VSFTPD service by running the commands
systemctl stop vsftpdfollowed bysystemctl start vsftpd.
apt install vsftpd
sed -i 's/#write_enable=YES/write_enable=YES/' /etc/vsftpd.conf
systemctl stop vsftpd
systemctl start vsftpd
CPU Utilization in URVEPi Debian 11
To show the CPU utilization, you can use the following simple steps:
- Install the
sysstatpackage by running the commandapt install sysstat. - Once installed, you can use the
mpstatcommand to display CPU usage statistics for all processors on the system. - The
-P ALLoption shows the utilization of all available processors, and the1option specifies the sampling interval in seconds. - Run the command
mpstat -P ALL 1to continuously monitor the CPU utilization with a one-second interval.
apt install sysstat
mpstat -P ALL 1
Disabling screensaver and monitor sleeping in URVEPi Debian 11
You need to change settings in Power Manager / Display (Blank after to 0, Put to sleep after 0, Switch off after 0. You can do it manually from Desktop Preferences or with this one-liner:
echo '<?xml version="1.0" encoding="UTF-8"?>
<channel name="xfce4-power-manager" version="1.0">
  <property name="xfce4-power-manager" type="empty">
    <property name="power-button-action" type="empty"/>
    <property name="brightness-switch-restore-on-exit" type="int" value="0"/>
    <property name="brightness-switch" type="int" value="0"/>
    <property name="dpms-enabled" type="bool" value="true"/>
    <property name="blank-on-ac" type="int" value="0"/>
    <property name="dpms-on-ac-sleep" type="uint" value="0"/>
    <property name="dpms-on-ac-off" type="uint" value="0"/>
  </property>
</channel>' > /home/linaro/.config/xfce4/xfconf/xfce-perchannel-xml/xfce4-power-manager.xml
And reboot your URVEPi with reboot command from root user (sudo reboot)
Removing Rockchip and Google "bloatware" from URVEPi Android 12
Please check, if you do not need any app from this list. This commands should be executed after flashing URVEPi. WARNING : If you see "Welcome screen", you need to finish it before running this code. After executing you shoud reboot your URVEPi with "reboot" command.
pm disable-user --user 0 com.google.android.inputmethod.latin
pm disable-user --user 0 com.google.android.videos
pm disable-user --user 0 com.google.android.calendar
pm disable-user --user 0 com.google.android.gm
pm disable-user --user 0 com.google.android.apps.docs
pm disable-user --user 0 com.google.android.apps.photos
pm disable-user --user 0 com.google.android.apps.tachyon
pm disable-user --user 0 com.google.android.apps.youtube.music
pm disable-user --user 0 com.google.android.apps.messaging
pm disable-user --user 0 com.google.android.apps.docs
pm disable-user --user 0 com.google.android.apps.photos
pm disable-user --user 0 com.google.android.apps.tachyon
pm disable-user --user 0 com.google.android.apps.youtube.music
pm disable-user --user 0 com.google.android.apps.messaging
pm disable-user --user 0 com.android.camera2
pm disable-user --user 0 com.android.calendar
pm disable-user --user 0 com.android.contacts
pm disable-user --user 0 com.android.music
pm disable-user --user 0 com.android.vending
pm disable-user --user 0 com.android.gallery3d
pm disable-user --user 0 com.google.android.dialer
How to install VNC Server in URVEPi Debian 11
You need to download and configure the autostart feature of x11vnc using these commands:
sudo apt -y install x11vnc nano
sudo nano /lib/systemd/system/x11vnc.service
Now, paste this configuration and change 'urve' to a password of your choice:
[Unit]
Description=x11vnc service
After=display-manager.service network.target syslog.target

[Service]
Type=simple
ExecStart=/usr/bin/x11vnc -forever -display :0 -auth guess -passwd urve
ExecStop=/usr/bin/killall x11vnc
Restart=on-failure

[Install]
WantedBy=multi-user.target
Exit the nano editor and save the file by pressing 'Ctrl + x' and then 'y'. Afterwards, open a terminal and enter the following commands:
sudo systemctl daemon-reload
sudo systemctl enable x11vnc.service
sudo systemctl start x11vnc.service
sudo systemctl status x11vnc.service
● x11vnc.service - x11vnc service
     Loaded: loaded (/lib/systemd/system/x11vnc.service; enabled; vendor preset>
     Active: active (running) since Mon 2023-03-06 22:51:13 UTC; 3s ago
sudo reboot
You can connect to the URVEBoard using any VNC client, such as RealVNC. Simply enter the IP address or hostname of the board, followed by the port number that x11vnc is listening on, which is typically 5900. Once connected, you will be prompted to enter the password that you set earlier during editing of x11vnc.service file.
Rotating screen in URVEPi Debian 11
You should remember that it may result in slower performance and choppy animations or videos. This is because rotating the display requires additional processing power and resources.
DISPLAY=:0 xrandr --output HDMI-1 --rotate right
DISPLAY=:0 xrandr --output HDMI-1 --rotate left
DISPLAY=:0 xrandr --output HDMI-1 --rotate inverted
# back to normal
DISPLAY=:0 xrandr --output HDMI-1 --rotate normal
In some cases, it may be necessary to perform the rotation at the kernel/boot level rather than using the xrandr command. This can help improve performance and prevent issues with animations and videos.
How to edit kernel parameters (bootargs) in URVEPi Linux?
Boot parameters are defined in "kernel/arch/arm64/boot/dts/rockchip/rk3568-linux.dtsi" file (line 15)
	chosen: chosen {
		bootargs = "systemd.unified_cgroup_hierarchy=0 earlycon=uart8250,mmio32,0xfe660000 console=ttyFIQ0 root=PARTUUID=614e0000-0000 rw rootwait";
	};
Let's say you need to force HDMI 1080p resolution, you can do it by adding video=HDMI-A-1:1920x1080@60:D to bootargs.
	chosen: chosen {
		bootargs = "systemd.unified_cgroup_hierarchy=0 earlycon=uart8250,mmio32,0xfe660000 video=HDMI-A-1:1920x1080@60:D console=ttyFIQ0 root=PARTUUID=614e0000-0000 rw rootwait";
	};
After editing dtsi file, you need to recompile kernel
./build.sh kernel
and use new boot.img file from kernel directory, or just run our "urve_prepare.sh" script. Then everything you need will be in URVEPi-LinuxImages.zip.
To check if new bootargs are loaded you neet to see /proc/cmdline:
cat /proc/cmdline
storagemedia=emmc androidboot.storagemedia=emmc androidboot.mode=normal  rw rootwait systemd.unified_cgroup_hierarchy=0 earlycon=uart8250,mmio32,0xfe660000 console=ttyFIQ0 root=PARTUUID=614e0000-0000
USB dongle / SD mounting for large Docker containers in URVEPi
As URVEPi has 8GB eMMC memory, you need external storage space. Let's assume you have USB dongle with Windows (FAT or NTFS) parititons
# WARNING : Please be sure /dev/sda is right storage memory. You can check it with command "lsblk -o name,size,model"

# delete all partitions on /dev/sda
sgdisk --zap-all /dev/sda

# create new ext4 partition
parted -s /dev/sda mklabel gpt
parted -a opt -s /dev/sda mkpart primary ext4 0% 100%
mkfs.ext4 -F /dev/sda1

# now we can use it
mkdir /mnt/usb
mount /dev/sda1 /mnt/usb

# install docker, docker.io and rsync, stop docker, copy files and mount our USB dongle as /var/lib/docker
apt-get install rsync docker docker.io
sudo systemctl stop docker.service
sudo systemctl stop docker.socket
rsync -aqxP /var/lib/docker/ /mnt/usb
mount /dev/sda1 /var/lib/docker
systemctl start docker
If you want to do the same with SD card, you need to find it with "lsblk -o name,size,model"
mmcblk1      29.1G
├─mmcblk1p1   256M
└─mmcblk1p2  28.9G
and modify our script for this /dev/mmcblk1 device
sgdisk --zap-all /dev/mmcblk1
parted -s /dev/mmcblk1 mklabel gpt
parted -a opt -s /dev/mmcblk1 mkpart primary ext4 0% 100%
mkfs.ext4 -F /dev/mmcblk1
mkdir /mnt/sd
mount /dev/mmcblk1 /mnt/sd
How to play accelerated video in URVEPi Debian 11
gst-launch-1.0 filesrc location=/usr/local/test.mp4 ! qtdemux ! h264parse ! mppvideodec ! kmssink render-rectangle="<0,200,1280,700>"

gst-launch-1.0 filesrc location=/home/linaro/Desktop/avengers_2_1080p.mp4 ! qtdemux ! h264parse ! mppvideodec ! kmssink render-rectangle="<0,0,1920,1080>"
How to check CPU temperature in URVEPi Android 12
 cat /sys/class/thermal/thermal_zone0/temp
 cat /sys/class/thermal/thermal_zone1/temp
Monitoring file changes in home directory in Debian
sudo apt-get update
sudo apt-get install inotify-tools
while read path action file; do echo "File '$path$file' has been $action"; if [ $action != "DELETE" ]; then cat "$path$file"; fi; done < <(inotifywait -m -r -e modify,create,delete,move /home)
Synchronize System Time and Hardware Clock with an Online Time Server
Synchronize your system time and hardware clock with an online time server for the timezone 'Europe/Warsaw':
sudo apt-get install curl jq
sudo date -s "$(curl -s 'http://worldtimeapi.org/api/timezone/Europe/Warsaw' | jq -r '.datetime')"
sudo hwclock -w