General URVE Pi
- Home Assistant
- I would like to create SSH connection with newly purchased URVE board PI. What is the root password for the initial connection
- Please let me know how to flash the OS without having access to windows.
- Do we have instruction to flash Android to URVE Pi?
- Booting from SD card
Home Assistant
Installation steps on SD Card
Currently it is possible to install home assistant on sd card due to the size of home assistant. Boot version should be from 2023.02.22. You can check boot date with command uname -v.
- Format SD Card and create new partition
# format SD card (mmcblk1)
sudo su
sgdisk --zap-all /dev/mmcblk1
parted -s /dev/mmcblk1 mklabel gpt
parted -a opt -s /dev/mmcblk1 mkpart primary ext4 0% 100%
mkfs.ext4 -F /dev/mmcblk1
- Mount created partition to /mnt/sd. Also create link between /mnt/sd and /var/lib/docker. In this case every docker container will be on sd card
# mount SD card to docker folder
mkdir -p /mnt/sd
mount /dev/mmcblk1 /mnt/sd
mkdir -p /mnt/sd/docker
mkdir -p /var/lib/docker
mount --bind /mnt/sd/docker /var/lib/docker
- Add partitions to /etc/fstab for automounting
echo "/dev/mmcblk1 /mnt/sd ext4 defaults 0 0" | sudo tee -a /etc/fstab
echo "/mnt/sd/docker /var/lib/docker none defaults,bind 0 0" | sudo tee -a /etc/fstab
- Install Home Assistant dependencies
# Install requirements
apt install apparmor jq wget curl udisks2 libglib2.0-bin network-manager dbus lsb-release systemd-journal-remote -y
curl -fsSL get.docker.com | sh
sync
- Install os-agent. You can find newest version of os-agent here: https://github.com/home-assistant/os-agent/releases/latest
sudo wget https://github.com/home-assistant/os-agent/releases/download/1.5.1/os-agent_1.5.1_linux_aarch64.deb
sudo chmod 777 os-agent_1.5.1_linux_aarch64.deb
sudo apt install ./os-agent_1.5.1_linux_aarch64.deb -y
sudo rm -f ./os-agent_1.5.1_linux_aarch64.deb
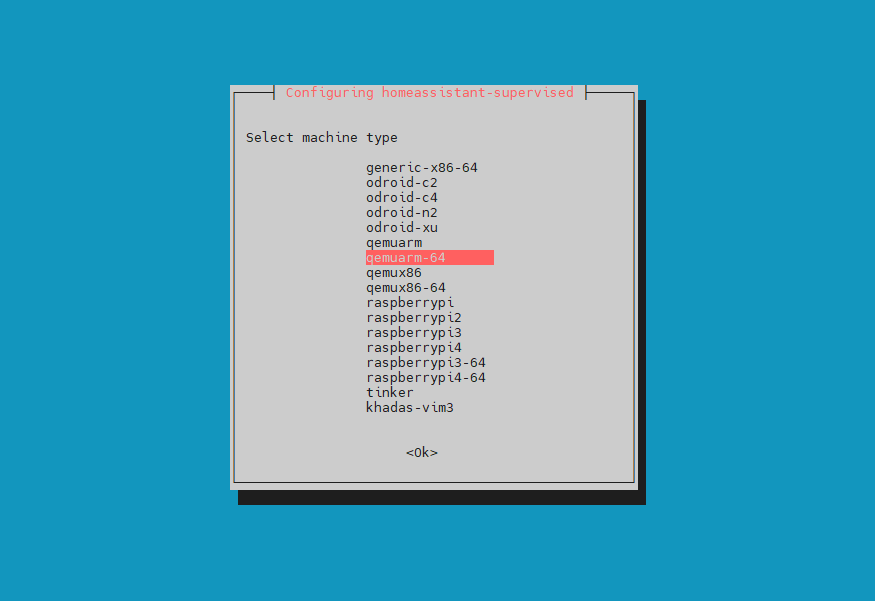
- Install home assistant supervisor. After first installation it will show error made by ipv6 support enabled. When asked about version select
qemuarm-64
# Install home assistant supervisor
sudo wget https://github.com/home-assistant/supervised-installer/releases/latest/download/homeassistant-supervised.deb
sudo chmod 777 homeassistant-supervised.deb
sudo apt install ./homeassistant-supervised.deb -y
echo "{\"log-driver\": \"journald\",\"storage-driver\": \"overlay2\",\"ip6tables\": false,\"experimental\": true,\"log-opts\": {\"tag\": \"{{.Name}}\" }}" > /etc/docker/daemon.json
sudo systemctl start docker.socket
sudo systemctl start docker.service
sudo apt install ./homeassistant-supervised.deb -y
sync
 7. Check if installation is completed with command mentioned below. Home Assistant creates 7 containers. Depending on your internet connection you have to wait at least few minutes.
docker ps -a
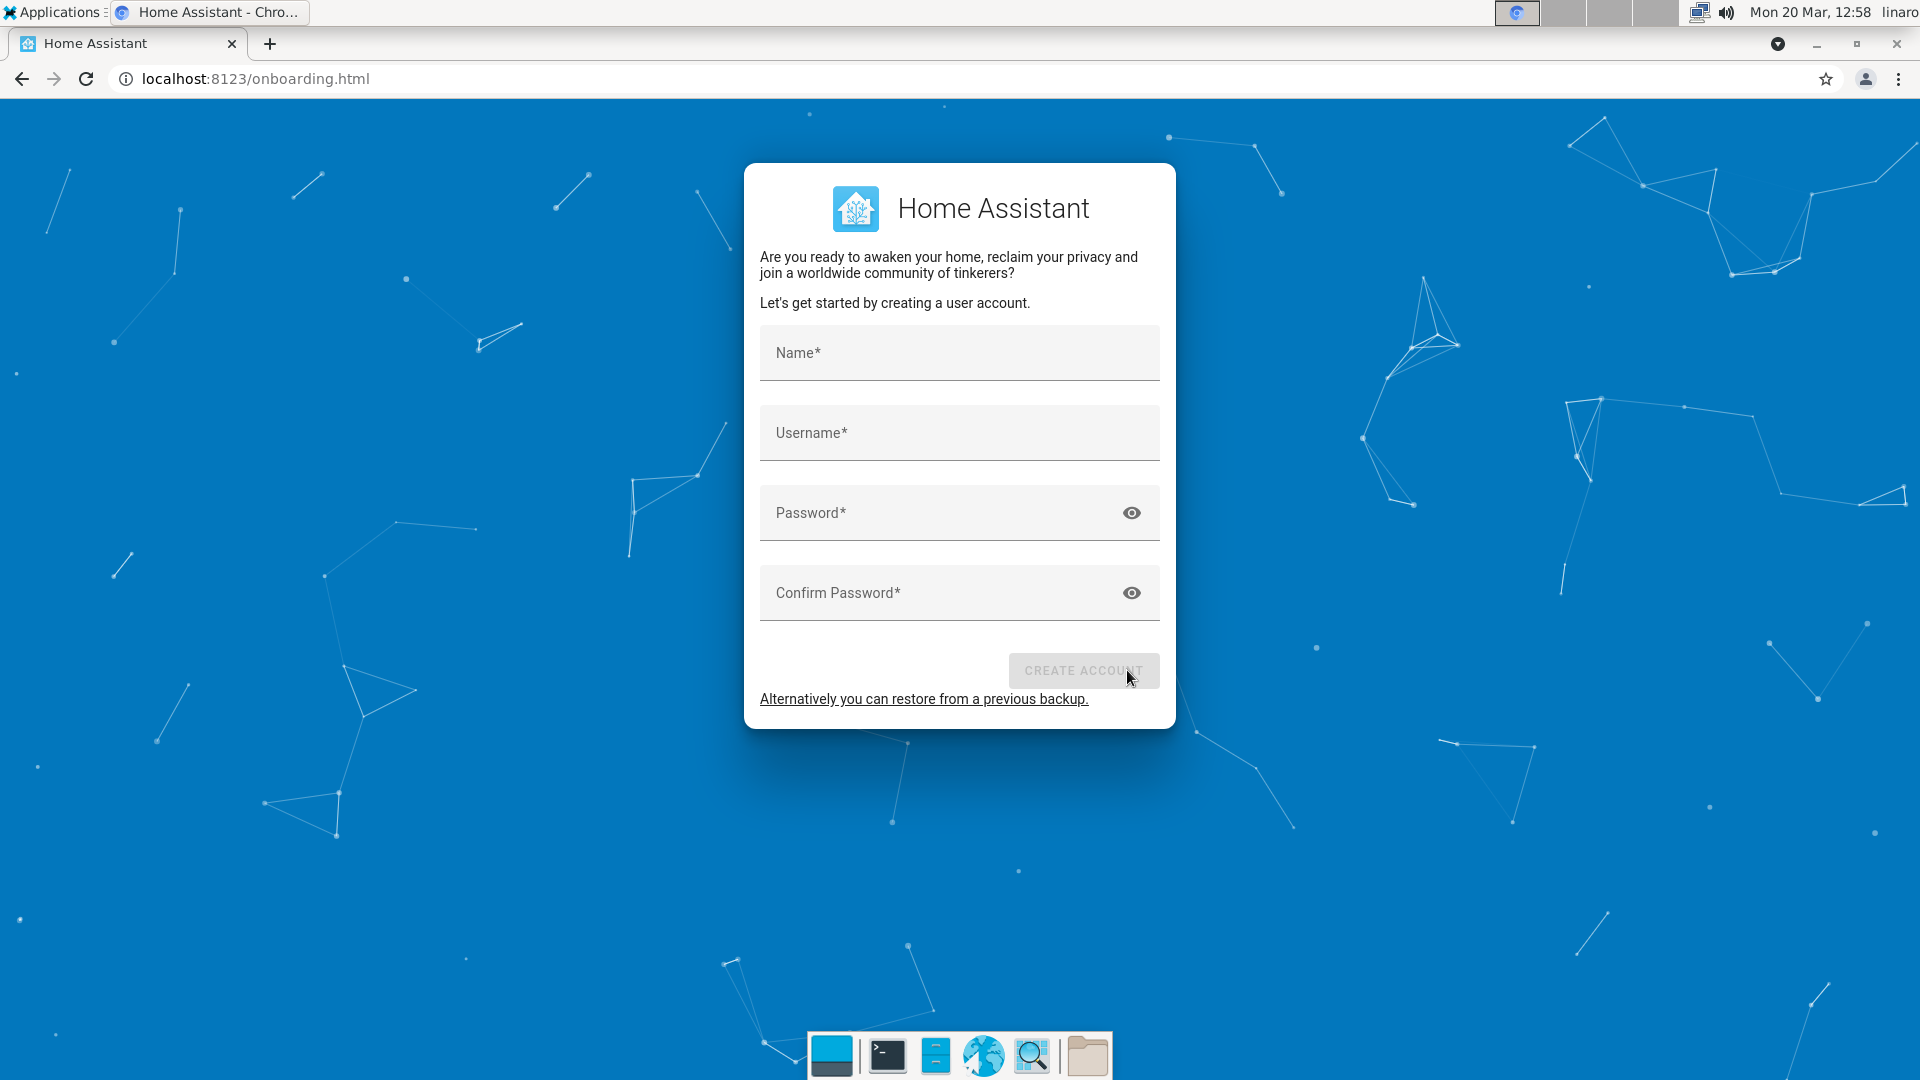
 8. After all these steps you can access Home Assistant page on default port 8123
I would like to create SSH connection with newly purchased URVE board PI. What is the root password for the initial connection
Default credentials:
Login: linaro
Password: linaro
Please let me know how to flash the OS without having access to windows.
You can use the flashing library on Linux: https://github.com/rockchip-linux/rkdeveloptool.
Do we have instruction to flash Android to URVE Pi?
The installation procedure for Android is the same as for Linux. More details in our user manual here: https://urveboard.com/pi/files.
Booting from SD card
1. Download OS image
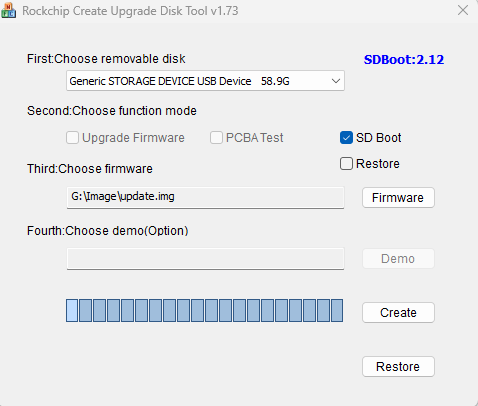
Go to urveboard.com and download OS Image (Debian 11). Extract content of the archive. Open SD_Firmware_Tool.exe from SDDiskTool_v1.73 directory.
2. Create bootable SD card
After opening the app select device and select SD Boot checkbox. If you keep default value Upgrade Firmware, this SD card will be in upgrade mode (it will upgrade existing system). Then select update.img located in Image directory and click Create.
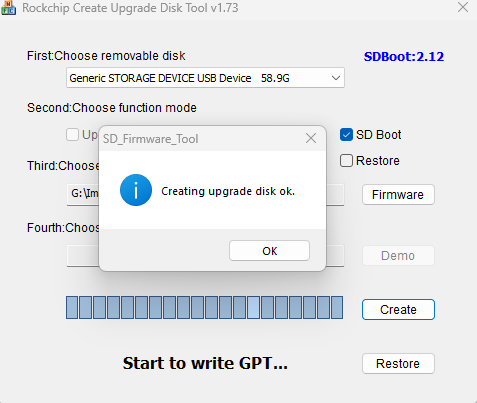
If any error occurs for example Writing Loader failed!, you should ignore that error and click Create again. After few minutes you should see Creating upgrade disk ok.
3. Clear internal memory
Enter terminal of the device. Either via SSH connection or with debug UART (Connecting to URVEPi Debug UART). Use command below to clear partition table of internal memory.
dd if=/dev/zero of=/dev/mmcblk0 bs=512 count=1 && sync
WARNING this command is irreversible and will delete internal memory data.
4. Verify
You can check if it works by using command lsblk. You should see root partition (/) mounted from mmcblk1p6.